- Details
- Category: Microsoft Purview
- Hits: 1336
Designing Microsoft Purview Labels
Sensitivity Labels help in the classification of data based on its sensitivity and apply protection on them. Before configuring sensitivity labels in Purview consider the following:
- What categories to use to protect information. Examples include Public, Confidential, Restricted etc.
- Are the label names and descriptions clear for users to understand and apply.
- What would you like each category of label to do? For example, restrict access, apply encryption, or block external users etc.
- Assign each category of label to a specific color. For example, green to public or red to restricted. This will provide a visual indicator when the user opens the document.
- Consider creating a Microsoft 365 Group and add users who will access restricted content.
The following table shows an example of label categories and their usage. You can also determine what items to protect for each of the labels in the planning stage. Once you have designed the labels and their properties, the next step will be to configure the labels in Purview.
| Label category | Details |
| Public | (1) Non sensitive information (2) Allow external access (3) Guests require MFA (4) No encryption |
| Confidential | (1) Sensitive information (2) Allow external access (3) Guests require MFA and (4) No encryption |
| Highly Confidential | (1) Restricted to organization users (2) No external access (3) No document encryption |
| Restricted | (1) Sensitive and restricted information (2) Allow external access (3) Encryption required (4) MFA required |
| Strict | (1) Restricted to organization users (2) No external access (3) Encryption required |
- Details
- Category: Microsoft Purview
- Hits: 2023
Setting up Conditional Access Policies in Purview
Conditional Access policies are a set of configured rules which are checked before granting access to content. For example, if a guest user is accessing sensitive content, whether to block access to the content or grant access by enforcing some controls such as Multi Factor Authentication (MFA).
Authentication contexts have to be set before defining conditional access policies. Authentication context allows organizations to apply conditional access policies based on specific scenarios. For example, require MFA for sensitive content or to enforce device restrictions for company managed devices.
Setting up Authentication Context
In this example we will create an authentication context to block Guest users from accessing sensitive content.
- In Azure navigate to Conditional Access > Authentications contexts
- Click New authentication context
- Enter a descriptive name. For example, Protect Sensitive Content Guests (Image 1)
- Enter a description and click Save
After adding authentication context, the next step involves creating a conditional access policy and assigning the authentication context to it.
Create Conditional Access Policies
- In Azure navigate to Conditional Access > Policies
- Click New policy
- Enter a descriptive policy name. For e.g. Restrict sensitive content for guests
- Under Assignment, click Users > Select users and groups > Guest or external users (Image 2)
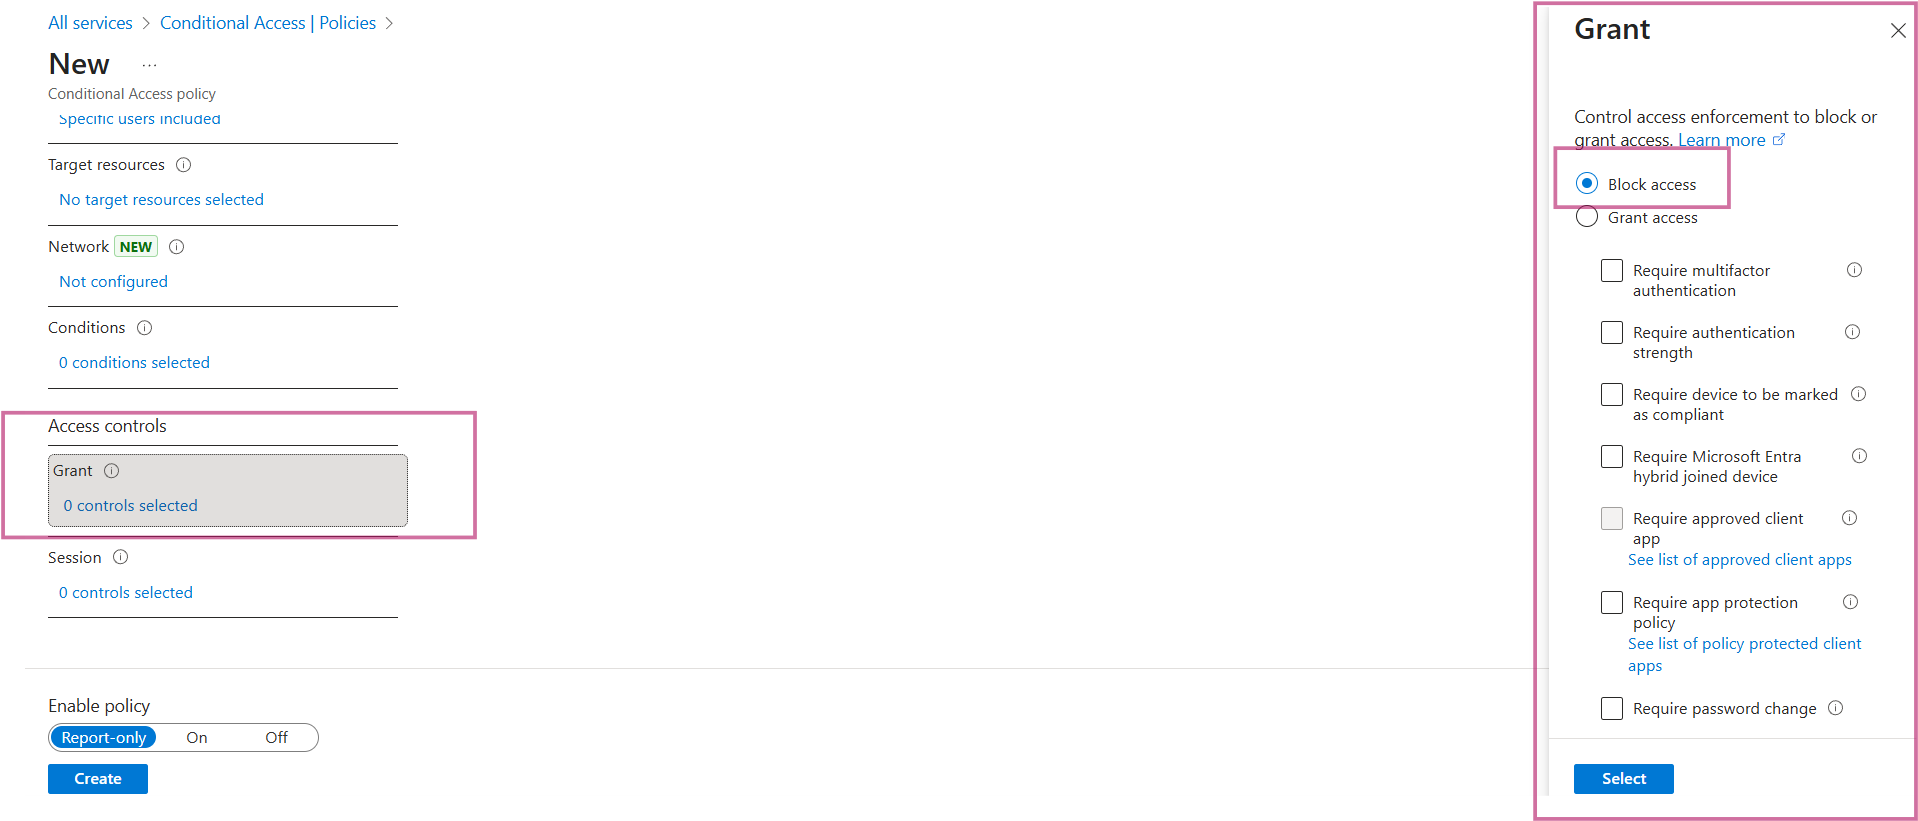
- Click Access controls - control access to either block or grant access based on the controls. In this example access is blocked (Image 3)
- Enable policy and click Create
The article outlined restricting guest users. However, conditional policies can be applied in several cases such as restricting unmanaged devices, preventing sign on from on-trusted locations etc. It can also be used in sensitivity labels - when creating sensitivity labels, authentication context with conditional access policy can be assigned to protect labelled SharePoint sites. Creation of sensitivity labels will be covered in a forthcoming article.
Image 1
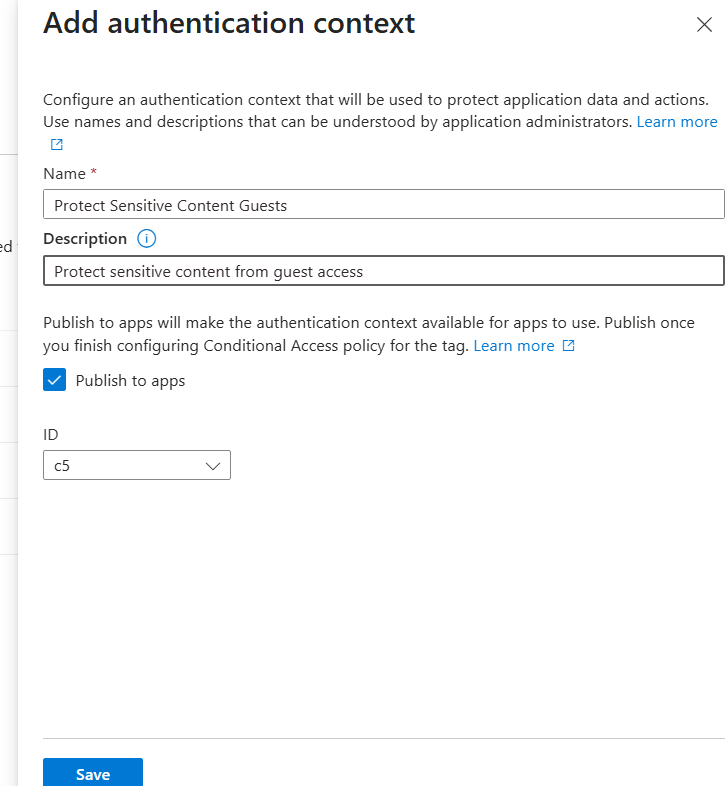
Image 2
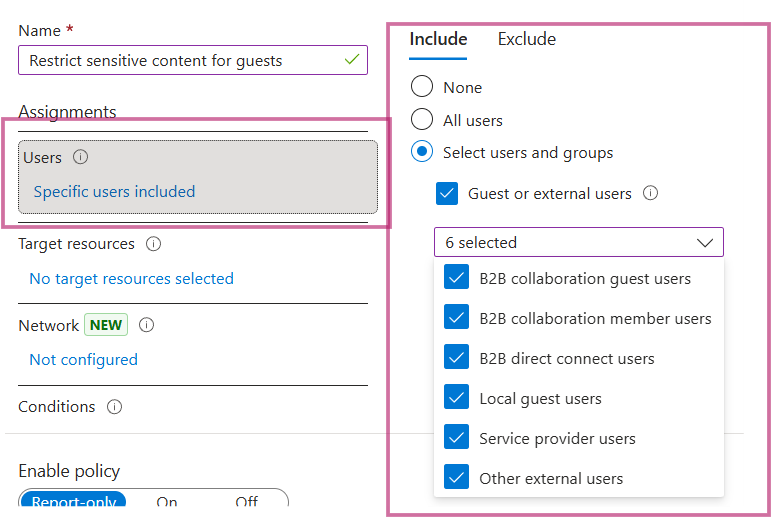
Image 3